Using indicators in Forex Tester 3
You can add an indicator or oscillator to the chart with the help of this button  on the toolbar or with help of Insert → Add Indicator menu:
In addition, you can click the right mouse button on the chart and select the "Add Indicator" item. You will see the dialog where you can modify indicator's properties before it is placed on the chart:
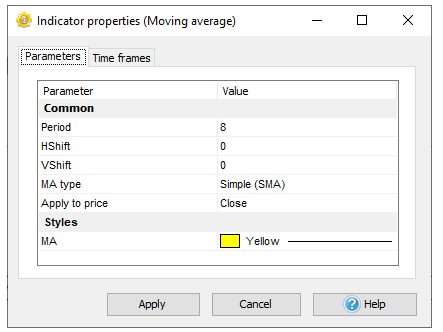
To modify an indicator’s parameter, you need to double-click on it or click the left mouse button and press the "Enter" key. Some of the properties may have the drop-down list or a dialog window where you can select some values:
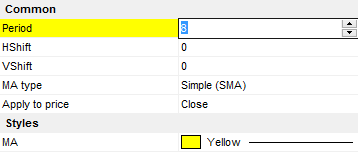
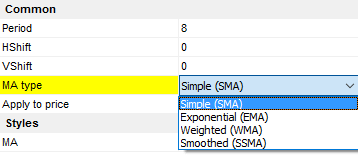
To cancel changes, press the "Esc" button on the keyboard, and to apply them press the "Enter" or "Tab" button, or click the left mouse button on the dialog.
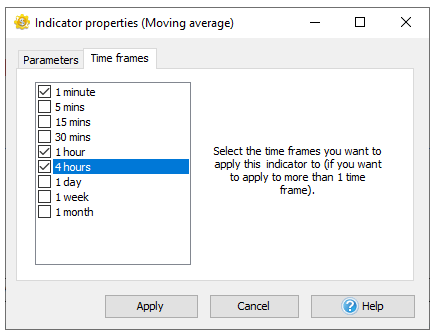
Each indicator is linked to one timeframe of the chart window. So, if you place it on the H1 time frame, you will not see it on other time frames (15 min, 1 min, etc.). It was done for optimization purposes, if not, it would slow down the testing process significantly. We recommend you to place indicators only on those time frames where you need them. You can do it with the help of "Timeframes" tab, activate the needed timeframes here:
To edit the indicator on the chart, please click the right mouse button on the indicator's line, you will see the next menu:
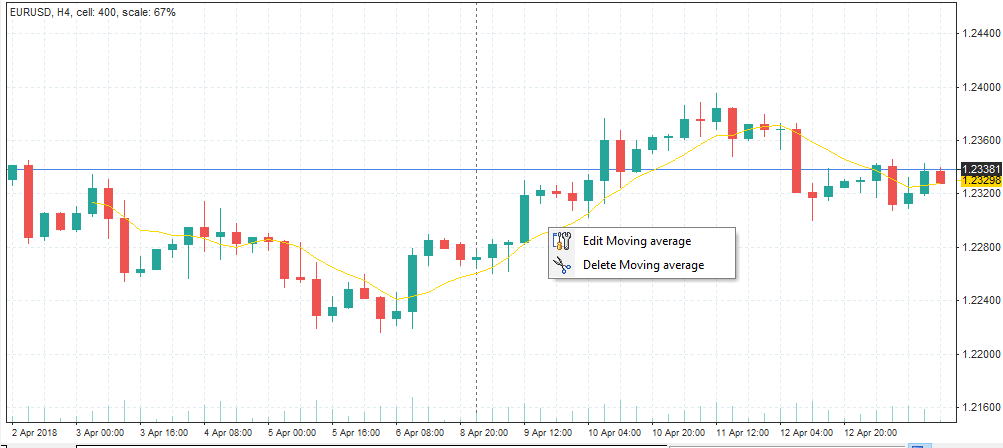
You can edit indicator's properties (select “Edit …” option in this case) or delete it from the chart (“Delete …“).
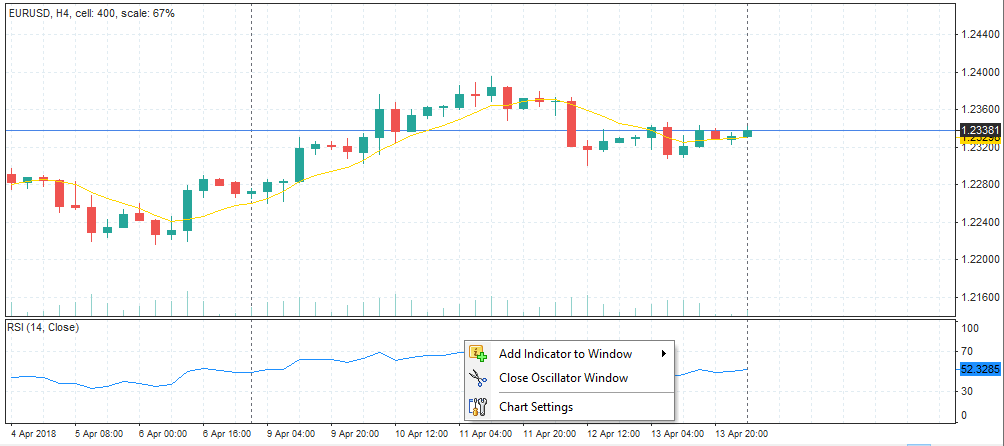
You can combine more than 1 indicator in the oscillator window. Click the right mouse button in the oscillator window and select "Add indicator to window". When you delete the oscillator's window, all other indicators in this window will be deleted too.
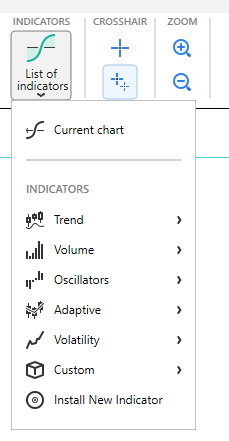
Also, you can see and manage all the indicators on all charts and timeframes with the help of “List of indicators” button on the toolbar:

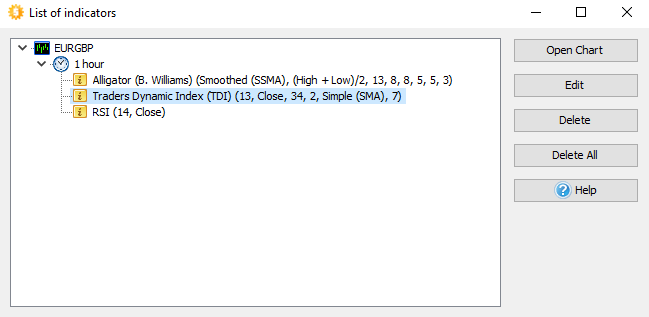
Here you can edit indicator properties, delete indicators, or delete all indicators on all charts at once.
We included lots of standard indicators into Forex Tester, but if you need any of the custom indicators that is not included in the program, you can create it by yourself or hire a programmer who can do this job. Custom indicators could be installed with the File → Install → Install new indicator menu. We have API to create custom indicators available for the C++ and Borland Delphi languages. You can get more information on our forum here.
The list of built-in Forex Tester indicators:
Accelerator Oscillator (B. Williams)
ADR
AMA (Adaptive Moving Average)
Average Directional Movement Index (ADX)
Alligator (B. Williams)
ATR (Average True Range)
Awesome Oscillator (B. Williams)
Bears Power
Bollinger Bands
Bulls Power
Commodity Channel Index (CCI)
Elder's Force Index
Envelopes
FATL
Fractals (B. Williams)
FTLM-STLM
Heiken Ashi
Ichimoku Kinko Hyo
Keltner Channel
Linear Regression Channel
Moving Average Convergence Divergence (MACD)
MA Crossover Signals
MFI
Momentum
Moving Average (Simple, Exponential, Weighted, Smoothed) with shift option
On Balance Volume (OBV)
Parabolic-SAR
PCCI
Pivot Points
Polarized Fractal Efficiency (PFE)
Price Channel
Price Daily Range
Rate of Change (ROC)
Relative Strength Index (RSI)
Solar Wind
Stochastic Oscillator
Range bars
Range Expansion Index
Trade dynamic index (TDI)
Time box
Ultimate Oscillator
Volume
Williams' Percent Range (%R)
ZigZag
Short Answer:
You can add an indicator or oscillator to the chart with help of Insert → Add Indicator menu. If you need to add an indicator that is not in the list, you can import it into Forex Tester 3 via File - Install - Install New Indicator menu. Please follow this tutorial to learn more about using indicators in Forex Tester.
Tags: useindicator|
Comments:
Leave a comment
