How can I create a new project in Forex Tester 3?
Before the testing starts, you need to prepare historical data for it. By clicking New Project button, you will be able to select the symbols that you want to test, the time period for testing, initial deposit in USD etc.
For example, you may have downloaded data for 10 currency pairs but want to test only 2 of them.
You can select these two pairs when creating a new project and test only these pairs for the period from 2012 till 2016 year, for example.
Please note that you can use real historical tick data during testing (they are available for subscribers of VIP data service).
You can start a new project by clicking New Project button or via File → New Project menu in the program:

In appeared Create new project window you can set the name of the project (in Project name field) and also the initial deposit in USD.
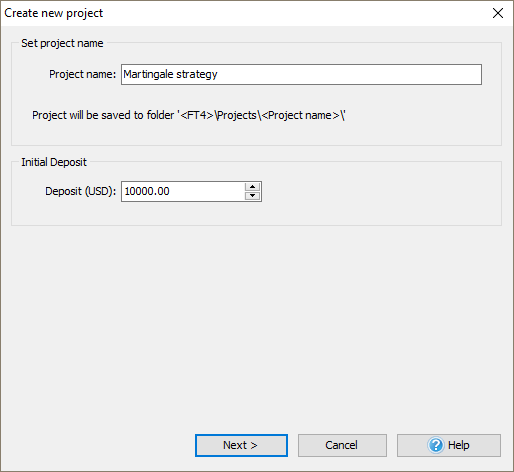
After this, please click Next button. The following window will be opened:
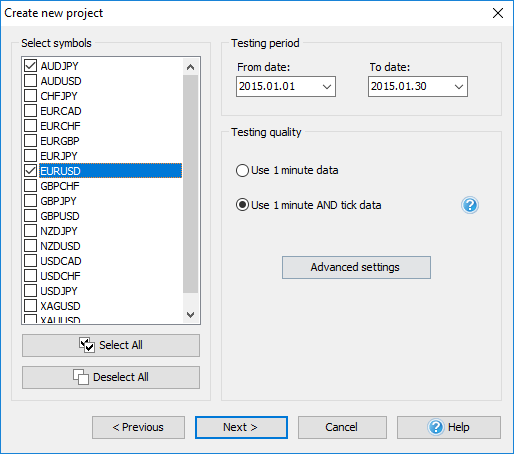
In this window, you need to activate the pairs from the list that you want to test (you can select all of them using Select All button). It is possible to test more than one currency symbol simultaneously.
In From date: and To date: fields, you need to select the start and end dates of the period that will be shown during testing.
Testing quality part of the window is responsible for the quality of the data that will be used by our program during testing.
Two methods of preparing are available:
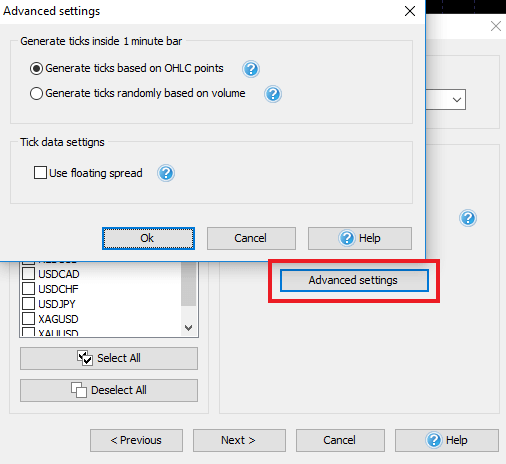
Generate ticks by OHLC points – if you select this method, each bar will contain 1-4 ticks based on Open/ High/ Low/ Close values of the given bar (less than 4 ticks are possible in the situation when Open=High, or Low=Close).
Generate ticks randomly by volume – it means that the number of ticks inside a 1-minute bar will be equal to the volume of this bar, ticks will be distributed randomly inside a single bar. We recommend using the first method of ticks generation, as it is the fastest and gives a good testing quality.
Check Use imported tick history and Use floating spread options if you have downloaded tick historical data from our server (tick data are available in VIP data service, please see details here). This option will give you the best testing quality.
After you select all necessary parameters, please click Next button to continue.
In the next window, you can select the time zone of historical data, use Timezone: slider for this purpose. The selected time zone will be applied to all the selected pairs for testing. Default selected time zone is GMT+0.
If you select "Start testing from the first date in range" then testing will be started from the date that you selected in "From date" field in the previous window.
But you can also change the starting date by selecting Define first Date to start (preload history before start date) option.
In this case the testing can be started from a further date (it can be selected in Start date field or by moving Preload days slider) and all previous data will be shown on the chart.
This option will be useful if you immediately want to build lines/indicators based on previous bars or want to analyze previous data and start trading based on them.
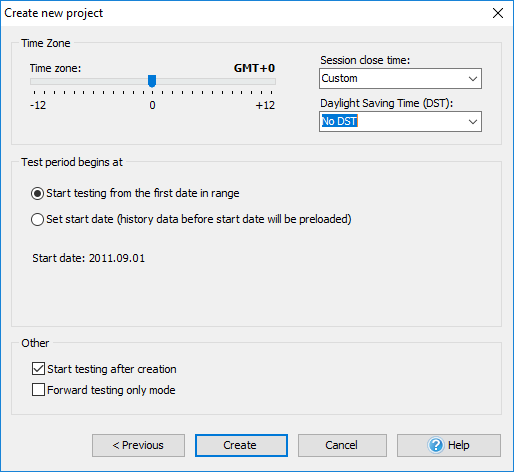
When you complete the configuration, please click Create button to finish the process of preparing data.
After this, you just need to click Start Test button, and the testing process will be started.

Short Answer:
Please use this tutorial to learn how to create new projects in Forex Tester 3.
Tags: /newproject|
Comments:
Leave a comment