Importing data in Forex Tester 2
You can import historical data into Forex Tester using Data Center. Here you can import these data from our data server or from a file. We provide free historical data on our site from 01/01/2001 to the current moment. (https://forextester.com/data/datasources). And we recommend you to use this source of data as one of the best and qualitative sources. Also you have the opportunity to use other sources that can provide data in a text format or import history from MetaTrader (we can not recommend it because it may have gaps in history).
It is highly recommended to use 1 minute timeframe to import into Forex Tester, it will be used to recalculate all higher timeframes. If you import, for example, 15 minutes bars, timeframes lower than 15 minutes will be incorrect.
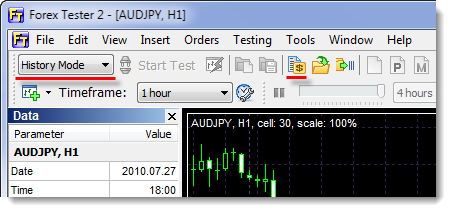
Import of history is enabled in History Mode only. In order to access Data Center, please click on this button:
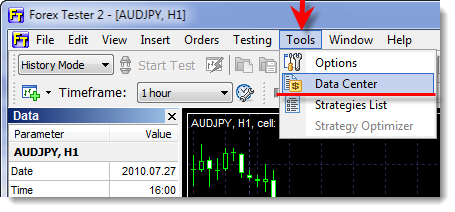
Or use this menu item:
You can use our Data Center in order to import historical data from our server or from a file.
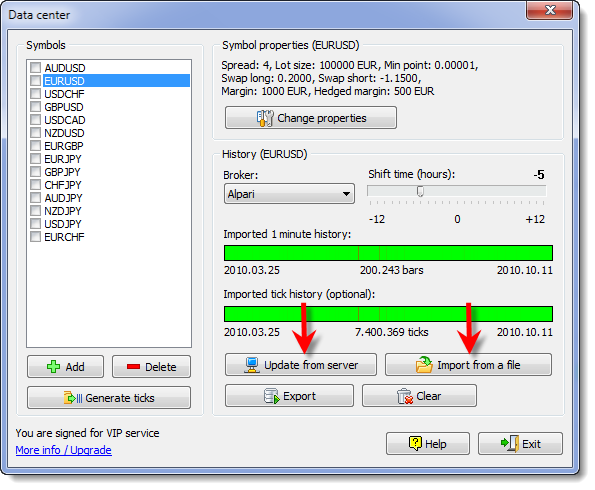
Importing history from data server
To import history from the data server, you need to select the symbol first and press the "Update from server" button. You can define the Broker and Shift time values first for this symbol. You need to do this only once, these values will be saved for the next imports. When you import from our data server, it will use these values to import quotes from the selected broker and with the selected shift time (the server uses GMT time internally, you can select different shift value to adjust data to your time zone). Note, that the list of available brokers can vary depending on the service type. Free service, which is included into the price of Forex Tester allows you to import historical data only from one broker - Forexite. If you want to import data from different brokers, you can sign for the Standard or VIP service (more info).
After pressing on the "Update from server" button, the following dialog will appear:

In this dialog you can see information about the broker in the Info box. It contains the infromation about the broker and symbol, available data range and the type of data to download. Data server provides 2 types of history - 1 minute history and tick history (which consists of real ticks and gives the best quality of testing). Tick history is available only for VIP service subscribers.
In the "Date range" box you can define what part of history you want to download. If you select the"Download new history" option, then you will get the part of history from the last update. For example, if you have already downloaded history up to 01/01/2010, and it is 10/01/2010 then the program will download the part of history from 01/01/2010 to 10/01/2010 and merge it with the previously imported history. This method is very useful to update your history time by time, so you always have up to date historical data. If you have an empty history (or cleared history before import) - it will download all available history for this symbol.
If you select the "Download part of history" option, then you will get the history for the requested period of time, this history will be correctly merged with the previously imported historical data.
In the "Select data to download" box you can define the type of data to download. You can download only 1-minute history, only tick history or both of them. Note, that tick history is available only for VIP service subscribers.
Click the "Update" button to start downloading:
Note: if you have requested a large amount of historical data, the server will need some time to prepare it.
Importing history from a file
In order to import historical data from a file please click the "Import from a file" button.
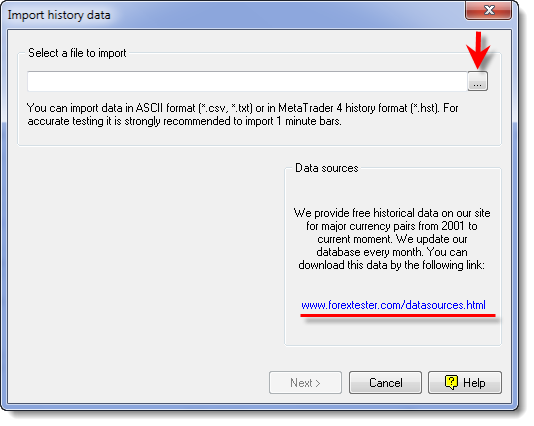
In the opened dialog window click the "..." button and select a file with historical data. File type can be in ASCII format *.txt *.csv or MetaTrader 4 format *.hst. In order to download the files with the latest historical data please follow this link: Data Sources
At our website, at the "Data Sources" section, we provide historical data in 1-minute format from January 2001 to the current moment. We update these files every month.
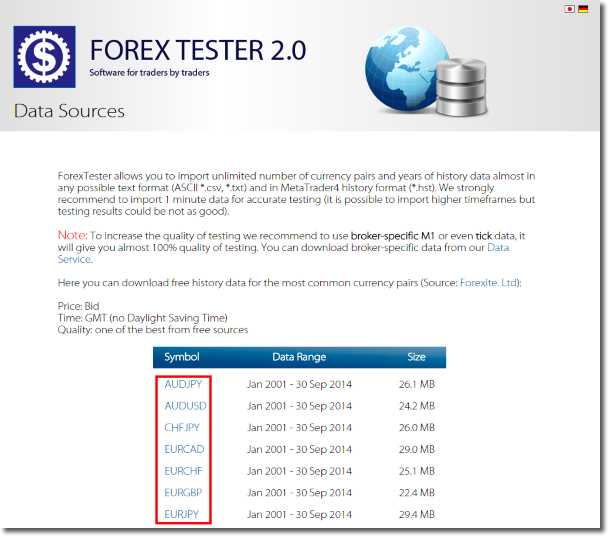
Click on the currency pair you want to download and save it to some folder on your computer (for example, the "Downloads" folder).
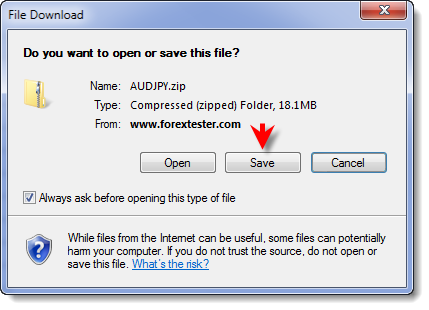
The downloading has been completed. But you downloaded *.zip file (compressed file). Open the folder where you saved the file ( the "Downloads" folder in our example), right click on it and select "Extract all" from the menu.

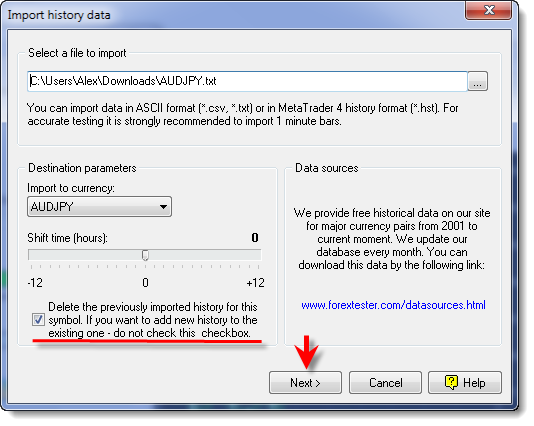
Let's return to our the "Import history data" window in the program. Click the button at the white square:
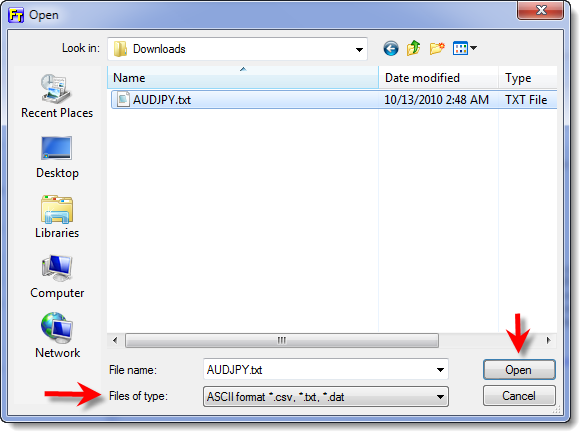
Find your unzipped file and click "Open":
If you import data from our site, the program will find a correct symbol, if not - select the currency by yourself. The shift time value is copied from currency settings and we do not recommend you to change it here. You can check the checkbox to clear all previously imported data to replace them with the new history. Click the "Next" button:
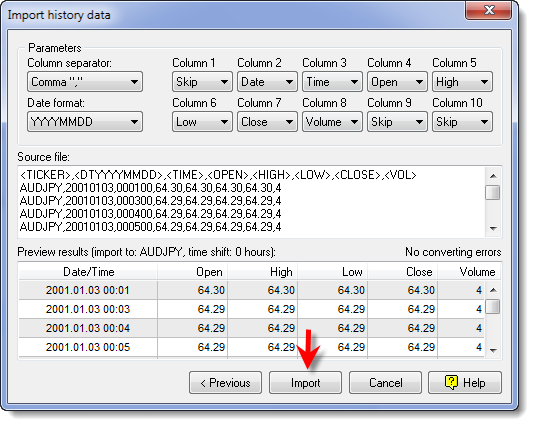
Look through the properties. If you download a file from our site, then you do not need to change anything. If you get it from another data source, then, probably, you will need to adjust some columns and data time style. Click "Import":
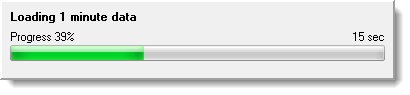
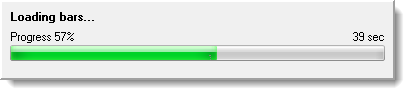
Data import can last from a couple of seconds to a couple of minutes, please be patient.
After importing has been completed click "OK" and close the Data Center window.
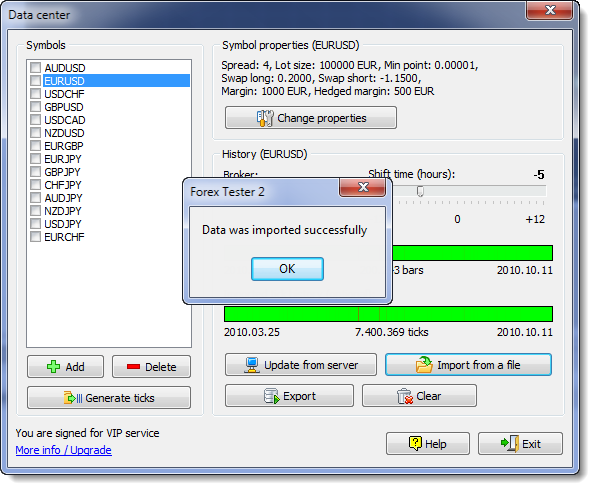
Check your imported data.
New imported data will be correctly merged with the previously imported data. So, if you have already imported 8 years of history and import new data for the last month, it will be merged with the existed data. Even if you import some new data that is overlapped with the old data, the part of all data will be deleted and replaced with the new one.
Short Answer:
Please use this tutorial to learn how to import data in Forex Tester 2.
Tags: tutorial|importing data|import|
Comments:
Leave a comment